
Spring is officially here!
To help you welcome this happy season of new growth, we’re sharing a how-to make your own welcome sign for your front door or entryway using items from VOA Thrift.
Spring is officially here! It’s time for fresh flowers, new beginnings, and airy decor. To help you welcome this happy season of new growth, we’re sharing a how-to make your own welcome sign for your front door or entryway using items from VOA Thrift.
This is a project where you can adjust to your crafty comfort level! Keep simple with the basics, or get more creative and add more flair.
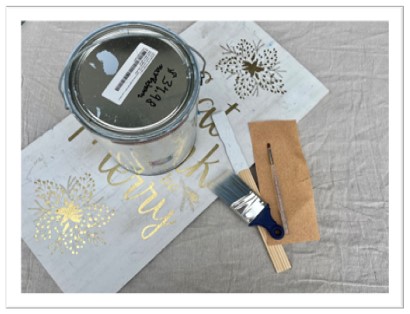
Gather the items you’ll need:

- Sign or board of some kind. You can find all kinds of options at VOA Thrift. You can use an old frame or a flat sign to paint over, or you can even use an existing welcome sign and give it a fresh look.
- Paint & brushes. If you want to keep the project more affordable, you can use paint and brushes that you have around the house. You could use craft paint or even paint from an old room makeover project.
- Clear polyurethane topcoat. If you plan to set your sign outdoors, you’ll need something to seal and protect your beautiful work of art. You can find Rust-Oleum or Krylon at home improvement or craft stores, or Amazon.
- Sandpaper. Depending on the state of your existing board, you may need a quick sanding, so a small piece will do. You can even use a leftover piece from another project.
- Stencils. If you don’t plan to freehand draw ‘Welcome’ – a stencil will be your best friend.
2. Prepare your board. Wipe it down with a clean and slightly damp towel. Wait for it to dry.
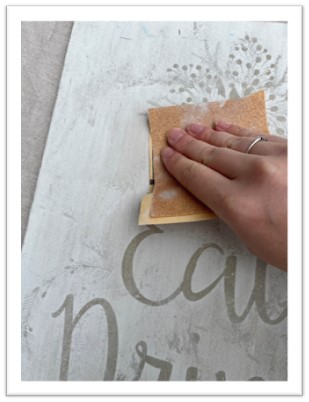
3. Sand it. If your sign is a little beat up with scratches or has a lot of existing paint or raised paint, give it a light sanding to even things out. Use the towel to clean off the dust and wait for it to dry before the next step.
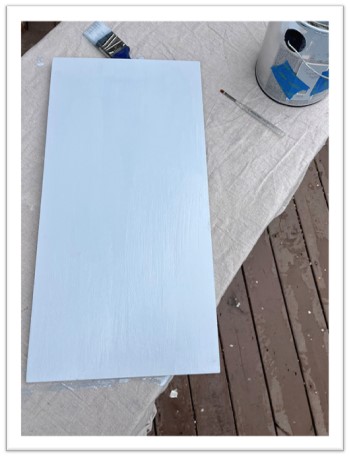
4. Paint your base coat. Depending on the existing color, you may need to wait for it to dry and add another coat. Listen to your inner crafty voice for this one.
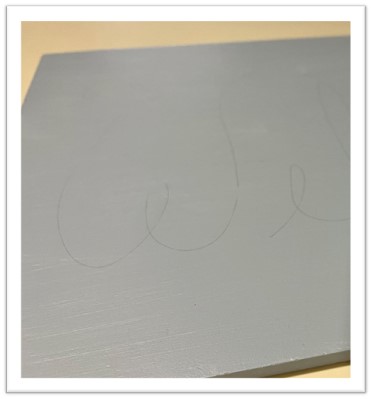
5. After your base is dry, draw a light guidelines to follow when you add ‘Welcome’
6. If you plan to use a stencil, you can trace the letters and paint them in, or you can paint directly on the stencil to ensure clean lines. If you are going to freehand draw ‘Welcome’ on your sign, give yourself an outline to follow with a light pencil.
7. Wait for your letters to dry. Add any embellishments desired. You could paint a flower for spring or keep it simple with small end cap lines for a finishing touch.
8. After all has dried, set your project in an outdoor space. This blogger likes to set down a piece of cardboard first. Then, spray your clear polyurethane to protect your new creation from the elements.
9. And there you have it – A beautiful new sign to welcome friends and family to your home!

This project was designed to be a welcome sign, but you could use these steps for something to set in your garden, an inspirational quote in your kitchen, or a warm message during the holidays.
Don’t forget to stop by our newest VOA Thrift store in Columbus (3583 E Broad St, Columbus, OH 43213)!